We have two adorable love birds who live in the store. They have told me time and time again that they want their turn to write a post on my blog. So to keep them happy I'm letting them write this one. Here goes!
Okay, okay, so we can't say "Polly want a cracker," but we do have hook bills that could leave a pretty good bite if you put your fingers near our cages. If you don't believe us, we would be happy to show you!
May we introduce ourselves to you? Drum roll please. We are the resident Peachface Lovebirds at Casabella, which by the way, is a very cool store in East Cobb. We the mascots, if you will, are much MORE beautiful than the falcons, hawks or thrashers. Besides, those birds are for the guys, we are all about girls! No one took the time to formally name us, so the girls call us "Nipper" and "Baby." The girls feed us, water us, talk to us, play with us, and scold us if we try to bite them. Considering that Casabella is known as the "bird store," we have a pretty good set up.
Sometimes kids like to just sit and watch us tear paper, but mind you it's not JUST tearing paper, we perforate it with our razor sharp beaks and very carefully and almost precisely tuck these pieces of paper into our rump feathers. Why, you ask, do we do this incredibly interesting thing with the paper? Well, it's because we are female Peachface Lovebirds and if we were in the wild we would do this to make nests to lay our eggs. Male Lovebirds not only do not make the nests, they do not know how to tuck bits of paper into their brilliant blue butt feathers like we do, which goes back to the girl thing! We can and will enjoy doing this amazing trick for hours. We are always entertaining the "little ones." It keeps their parents shopping longer!
The next time you visit Casabella, whistle at us and we will say "hello" back in bird language. See you soon!
Friday, December 31, 2010
Friday, December 17, 2010
Get The Look
This year I abandoned the traditional red and green decoration for my mantle. I even decided against gold and white. But I'm getting ahead of myself. My process is simple.
Before deciding on a color, I unpacked my boxes that were filled with decorations. My floor was covered with lots and lots of greenery, ribbon, candle holders, candles, miniature statues, angels, and old and new ornaments.
Next, I thought of a theme. After looking at my decorations, I decided to make color the theme. I chose copper and bronze. Before designing the mantle, I had to clear everything off to make a clean slate.
The first things I put on the mantle were candle holders. I wanted height and these candle holders provided that. I also placed greenery in tall vases to add more height. Then I placed additional greenery to provide a cushion the ornaments and to drape over the edge.
Ornaments and greenery are placed throughout my home...in the living room, the hallway and the kitchen.
Below is one of the mantles in the store. Pam, one of our merchandisers, did a great job designing this one. Can you guess the story?
I hope that my pictures and directions have made it easy for you to design your own mantle. Bring me a picture, I can't wait to see what you've created!
Monday, November 29, 2010
Jean's Pick
From time to time our furniture guru, Jean, will spotlight one of our favorite pieces of furniture in the store. Her first pick is this,
an amazing, slightly curved, three drawer chest with bun feet.
The manufacture took it's inspiration when creating this line, from the offices of architects of a bygone era. The collection is made of 90% reclaimed pine, making it a ecochic product.
The collection features an array of occasional pieces in a stripped down and raw finish. We carry several other pieces, equally as beautiful as this.
The exact chest was discovered in the on-line Horchow Catalog (listed as the Hazel chest) for $1699.00 plus $130. for shipping, but our price is much lower at a little over $1300.00, and guess what? No shipping!
The chest is 36" high, 50" wide and 36" deep. It's a savings of nearly $500.00 any way you look at it!
Thursday, November 11, 2010
We're Ready!
Tomorrow is our annual Holiday Open House. Most of the decorating is complete, so I thought it would be fun to show you the before and after images. We began decorating in late September in the area toward the back of the store. The ornaments, trees, and other holiday decor began arriving in the summer and we started the unpacking. By September the merchandise was moved to our Christmas area where we begin unloading it from the crates and carts. The area was blocked off during this time so our shoppers would be surprised when we opened about a month later.
Here is a before picture of one of the walls when the decorating began.
And here it is completed!
Again, here is the before.
And now.
These small trees will soon brighten the room.
See?
This is one of our many large trees. As you can tell, it needs help.
Done. So beautiful!
Here is a before picture of one of the walls when the decorating began.
And here it is completed!
Again, here is the before.
And now.
These small trees will soon brighten the room.
See?
This is one of our many large trees. As you can tell, it needs help.
Done. So beautiful!
We hope to see you soon!
Thursday, October 28, 2010
Meet Jean, Our...
Furniture Guru.
Jean came to us a few years ago after working many years at Storehouse... just across the street! Being involved in the furniture business for over twenty years, Jean has a vast knowledge in all aspects of the industry, including design and fabrics. She knows her way around the furniture markets in North Carolina and is instrumental in purchasing furniture for our store.
Rowe, Norwalk, Bruce, Four Seasons and Bramble are five of the most popular furniture lines that we carry at Casabella. We also have hundreds of fabric samples that you may take home to help you with your decisions.
With the holidays approaching and an on-going furniture sale, this is a great time to consider a new look in your home. Jean loves assisting clients with their furniture needs and desires. With her knowledge and your ideas, together we can help you, as Jean says, "embrace your space."
Jean came to us a few years ago after working many years at Storehouse... just across the street! Being involved in the furniture business for over twenty years, Jean has a vast knowledge in all aspects of the industry, including design and fabrics. She knows her way around the furniture markets in North Carolina and is instrumental in purchasing furniture for our store.
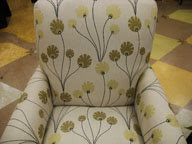
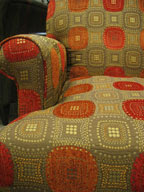
She is excited about the new corduroy fabrics that we offer in several colors. She says the feel of the fabric gives a comfortable feeling that would be a welcome addition to your home.
Rowe, Norwalk, Bruce, Four Seasons and Bramble are five of the most popular furniture lines that we carry at Casabella. We also have hundreds of fabric samples that you may take home to help you with your decisions.
With the holidays approaching and an on-going furniture sale, this is a great time to consider a new look in your home. Jean loves assisting clients with their furniture needs and desires. With her knowledge and your ideas, together we can help you, as Jean says, "embrace your space."
Monday, October 18, 2010
Follow The Yellow Brick Road
Okay, I admit it, we don't actually have yellow bricks, but we do have red ones! Here's how it started.
We did lots and lots of research and shopping before moving into this huge space. For months I scoured the antique stores and flea markets searching for anything that I thought would fit into our new concept. After buying the architectural pieces, I began thinking about the floor. It was HUGE and it was covered with a very old linoleum that was in terrible condition.
It was obvious that the floor had to be covered or painted. I had some experience in painting floors; I had previously painted the floor in the great room in my home and I thought it would be a good idea to give it a try. But before the floors were to be painted, we needed to develop the rooms.
My good friend, Dennis Birchler (an architect), and I spent months planning the entire area. He was instrumental in incorporating the architectural pieces as I designed the various "rooms." Wanting each room to have it's own character, I designed the floors throughout.
To complete the project, I contracted with a faux painter who used an oil-based paint to complete the project. The photo below shows a faux tile with a fleur-de-lis placed sporadically.
The cobblestone pattern was painted using several colors of paint, a large stencil, and the shadows painted by a very small brush. Yes, it took forever!
And finally... the bricks. The stencil that he used made painting this section a little faster.
So there you have it. Watch your step!
Tuesday, August 31, 2010
Need More Space? Try This.
Even in a store as large as Casabella, we often run out of space. I know it's hard to believe, but with the addition of more furniture lines we needed to do something to make it easier to navigate through the store. Pictured below is one solution.
We pulled the table apart! Two of the tables on the floor were found at flea markets, so I didn't worry about ruining a good table. Here is how we stabilized the table. We used two L brackets. That's it!
This is a table in the back of the store. Because the space leading to the sale room and restrooms is narrow, we needed two narrow tables to hold two displays. Instead of buying two tables, we sawed one in half.
Again, it's secured with L brackets.
Another table is located in the jewelry section.
I used this design tip in my own home.
It's a great idea to use in a small hallway, or a room that is too small for a large piece of furniture.
Try it and let me know how it turns out.
Wednesday, August 18, 2010
Welcome !
I'm so excited to start this blog. I hope to share with you a multitude of ideas that you can use in your own home. If you've been to our store you've seen the various vignettes showcasing our furniture, dinnerware, table linens, artwork and many other decorative items too many to mention here.
But before I share how and why we design certain vignettes, I thought you might want to see how we actually start with the bones. (That's Ann talk for the first step in creating a vignette.) For example, we had several natural bookcases located throughout the store. I thought they needed a new look so I decided to pull out the paint brush...or I mean, roller. The first part of the process involved removing objects from the shelves and moving them into the warehouse. After getting them in place, I had to remove the shelves to paint them first. That was the easy part.
Sanding and priming came next. I like to use oil based paint for display pieces in the store. Although it has a terrible odor, it seems to "hold up" with all of the wear and tear it gets around here.
See you soon!
But before I share how and why we design certain vignettes, I thought you might want to see how we actually start with the bones. (That's Ann talk for the first step in creating a vignette.) For example, we had several natural bookcases located throughout the store. I thought they needed a new look so I decided to pull out the paint brush...or I mean, roller. The first part of the process involved removing objects from the shelves and moving them into the warehouse. After getting them in place, I had to remove the shelves to paint them first. That was the easy part.
Finally, done!
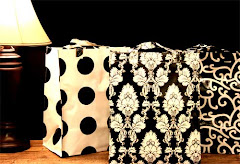
I think they look great as a display for our new line of bags by Two Loops.
See you soon!
Subscribe to:
Posts (Atom)


